Con la intención de no eclipsar el resto de apps de Abakal en Google Play Store esta app se distribuirá bajo demanda. Si la desea, diríjase a nosotros utilizando la sección de contacto:
 El programa GIS-Local está en Play-Store:
The GIS-Local program is in Play-Store:
https://play.google.com/store/apps/details?id=com.nieto.luis.gis_local_2
La funcionalidad básica consiste en la realización de un trazado rápido de una red de colectores, un inventario de mobiliario urbano, una distribución de puntos de luz y/o cualquier otra cosa trazable o contable en un municipio. Permite además la exportación de todos estos datos a un archivo de texto, kml (Google Earth) y dxf (CAD).
Primer paso LA ENVOLVENTE DE LOS DATOS / First step THE ENVELOPE OF THE DATA
El primer pantallazo del programa es el siguiente:
The first screenshot of the program is as follows:

Podremos elegir entre líneas y puntos. Si elegimos una de ellas, por ejemplo líneas. Aparecerá la segunda línea:
We can choose between lines and points. If we choose one of them, for example lines. The second line will appear:

Lo primero será crear un grupo (en el caso de haber escogido líneas, si hubiéramos escogido Puntos la opción se llamaría conjuntos). Este grupo se crea pulsando sobre Nuevo, se elimina pulsando sobre Elimina y se escoge eligiendo el grupo en el desplegable.
The first thing is to create a group (in the case of having chosen lines, if we had chosen Points the option would be called sets). This group is created by clicking on New, it is deleted by clicking on Delete and it is chosen by choosing the group in the dropdown.
The first thing is to create a group (in the case of having chosen lines, if we had chosen Points the option would be called sets). This group is created by clicking on New, it is deleted by clicking on Delete and it is chosen by choosing the group in the dropdown.
 |
| Proceso de creación de grupo |

El siguiente paso consiste en la creación de tramo para Líneas o subconjunto para Puntos.
The next step is to create a section for Lines or a subset for Points.
The next step is to create a section for Lines or a subset for Points.


Y por último el subtramo o elemento:
And finally the sub-tranche or element:
And finally the sub-tranche or element:

Segundo paso EL MARCADO DE LOS DATOS / SECOND STEP MARKING THE DATA
Ahora se nos aparecerá el botón "Marcar" y podremos pulsar sobre el mapa (siempre que nuestro GPS esté activo)
Now the "Marker" button will appear and we will be able to click on the map (as long as our GPS is active)
Now the "Marker" button will appear and we will be able to click on the map (as long as our GPS is active)

Tras pulsar, el programa nos preguntará si queremos incorporar alguna información adicional. Y éste es el momento de hacerlo.
After pressing, the program will ask us if we want to include some additional information. And this is the time to do it.
After pressing, the program will ask us if we want to include some additional information. And this is the time to do it.

Uno a uno se irán marcando los puntos en el mapa. En el diálogo anterior si hubiéramos pulsado "Cancelar" saldríamos del cuadro de diálogo sin que el programa hiciera nada. Si se hubiera pulsado "Eliminar" borraría el último punto creado.
One by one they will be marking the points on the map. In the previous dialog if we had pressed "Cancel" we would leave the dialog without the program did anything. If "Delete" was pressed, it would delete the last created point.
One by one they will be marking the points on the map. In the previous dialog if we had pressed "Cancel" we would leave the dialog without the program did anything. If "Delete" was pressed, it would delete the last created point.
EL MARCADO AUTOMÁTICO / THE AUTOMATIC MARKING
Si se pulsa la opción "Automático el programa nos lanzará la siguiente pregunta:
If the "Automatic" option is pressed, the program will ask the following question:
If the "Automatic" option is pressed, the program will ask the following question:

Podremos elegir en que el marcado sea por tiempo (segundos) o en distancia (metros). La cantidad se puede modificar y por defecto nos propone 10 (metros o segundos). Si queremos parar y continuar con el método manual se vuelve a pulsar sobre el mismo "checkbox".
We can choose where the dialing is by time (seconds) or distance (meters). The quantity can be modified and by default it proposes 10 (meters or seconds). If we want to stop and continue with the manual method is pressed again on the same "checkbox".
We can choose where the dialing is by time (seconds) or distance (meters). The quantity can be modified and by default it proposes 10 (meters or seconds). If we want to stop and continue with the manual method is pressed again on the same "checkbox".

Según se vayan creando los puntos se irán visualizando en la pantalla.
As they are created the points will be displayed on the screen.
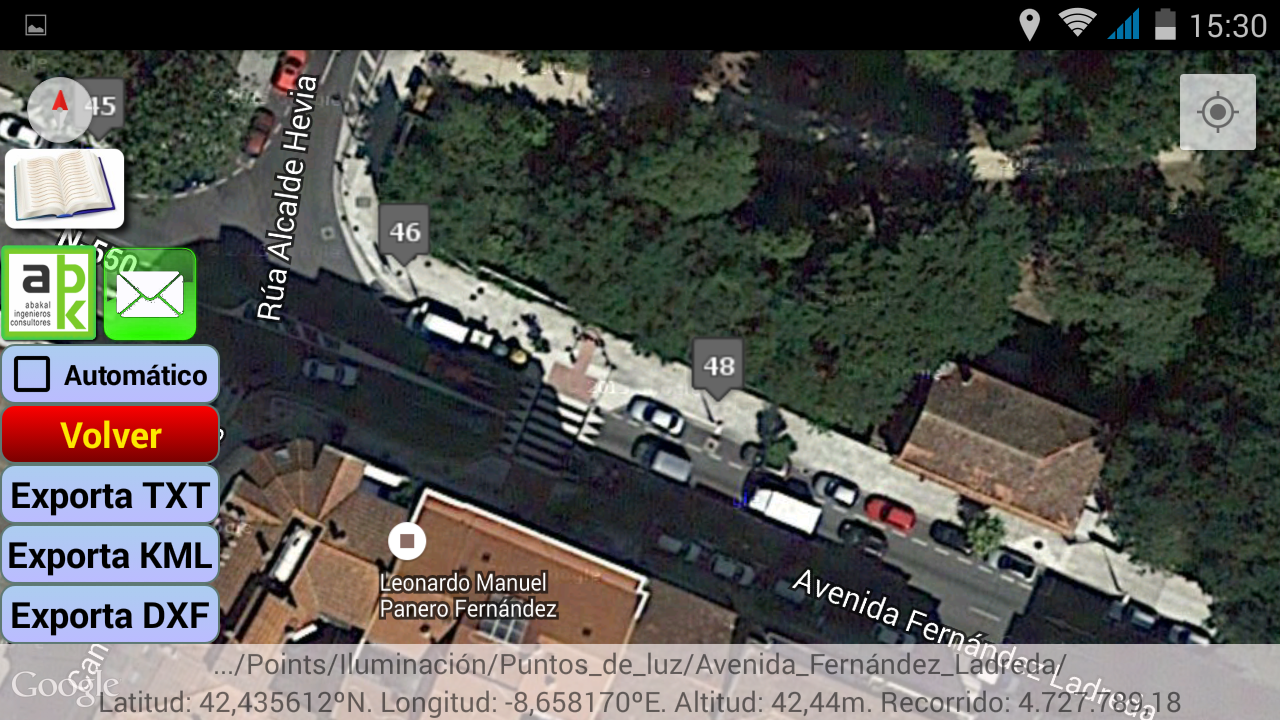
Un ejemplo en el caso de Puntos (Colocación de Puntos de luz, farolas)
As they are created the points will be displayed on the screen.
Un ejemplo en el caso de Puntos (Colocación de Puntos de luz, farolas)
An example in the case of Points (Placing of points of light, lampposts)


EXPORTACIÓN DE DATOS / EXPORT OF DATA
Si pulsamos sobre el botón "Exporta TXT" nos exportará los datos en formato de texto:
If we click on the "Export TXT" button we will export the data in text format:
If we click on the "Export TXT" button we will export the data in text format:

Si pulsamos sobre el botón "Exporta KML" nos exportará los datos en formato de KML de Google Earth:
Clicking on the "Export KML" button will export the data in Google Earth KML format:
Clicking on the "Export KML" button will export the data in Google Earth KML format:


Si pulsamos sobre el botón "Exporta DXF" nos exportará los datos en formato de CAD:
If we click on the button "Export DXF" we will export the data in CAD format:


Un mensaje nos indicará donde han sido colocados estos archivos.
A message will tell us where these files have been placed.
A message will tell us where these files have been placed.
Hola, buenas tardes.
ResponderEliminarPongo aquí esta solicitud, por si alguien me pudiera ayudar.
Estoy buscando alguna app sobre android gratuita de captura de datos con gps externo, del estilo de este formidable y sencillo programa y que luego o exporte a un formato universal.
La única condición que necesito es que esta app permita recibir NMEA y la comunicación sea bluetooth.
Muchas gracias.
Hay varias, dependiendo si lo que quieres es una lectura de datos (busca "bluetooth gps" en Google play) o si lo que quieres es ver los datos en bruto ( busca "terminal for bluetooth").
EliminarEn ambos casos vigila el consumo de batería y si se recalienta tu dispositivo. A veces ocurre con el uso continuado del bluetooth.
Si tienes alguna duda más puedes mandarme un e-mail.
Gracias Luis, así lo haré.
EliminarBuen fin de semana.